Textures Dont Show Up in Mixamo Upload
I've simply worked out how to import Synty characters into Blender via Mixamo. It's a somewhat circuitous procedure with a few pitfalls, and while it's all fresh in my listen, I idea I'd all-time write it down somewhere. The workflow is similar for both the SimplePeople and the Polygon Metropolis characters, and I would imagine other Synty characters volition probably work with these instructions just likewise.
Annotation that I'thousand simply using Blender and Mixamo, no other plugins or game engines. I'll also explain how to add textures while nosotros're in the procedure, considering that'due south not exactly intuitive. Here's the step-by-pace outline:
- import Synty character into Blender (equally FBX)
- correct pose and utilize texture
- export as FBX (see settings below)
- import into Mixamo
- use desired blitheness and export (every bit FBX)
- import into Blender and meet the blitheness
Import your Synty Character into Blender
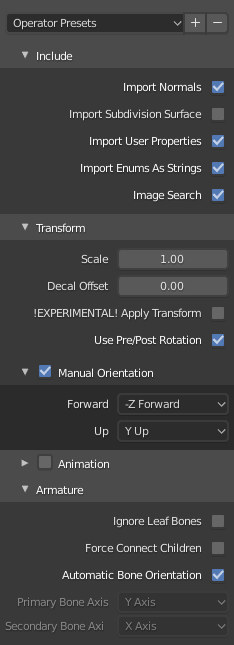
I'm using Blender 2.82 for this, hopefully the interface volition stay the same for the next few days ?. I recommend deleting all default objects from the scene before proceeding. FBX is pernickety about what's included, and nosotros want to keep the defoliation to an absolute minimum. With an empty scene, caput over to File – Import – FBX.
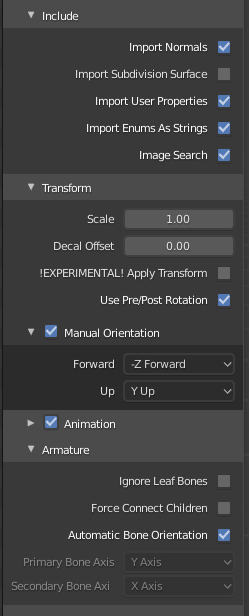
We need to make sure both the object and armature are rotated more or less correctly. Here's what works for me:
- under Transform, use Transmission Rotation with the post-obit values:
- Forward = -Z Forrad
- Upwards = Y Up
- nether Armature, employ Automatic Bone Rotation
The other options are at their default I believe.
Once imported, yous'll see a chip of a mess… but don't worry about it, we'll fix information technology in a second.
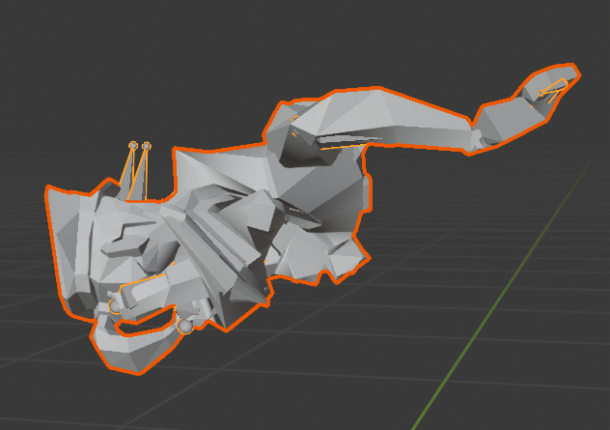
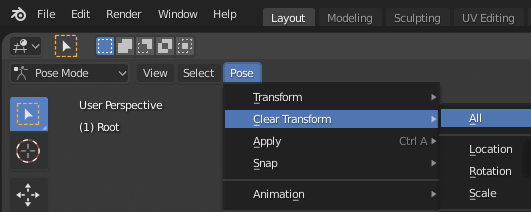
The play a trick on at present is to go into Pose Way and clear all values. That'll de-tangle this mess. Pose Fashion is at the top left, where you normally switch between Object Mode and Edit Mode. I didn't even know Pose Mode existed, until Titan Gaming brought it to my attending. He has a very skillful tutorial well-nigh this procedure, with more than tips on how to involve Unity into the process. Well worth checking out!
Once in Pose Way, click on Pose – Articulate Transform – All.
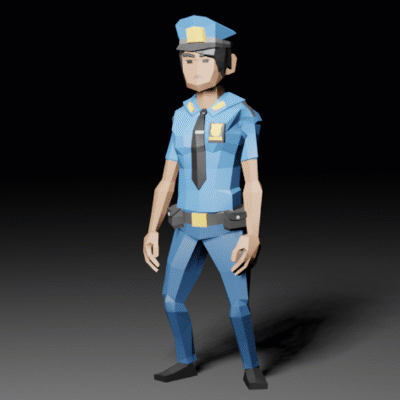
Nosotros now run into a standing up character, albeit without textures (the Female Police Officeholder in my case). Let'south apply those so that the right file is referenced in the FBX we're creating. That fashion we tin can employ it directly from the Mixamo export in the next step.
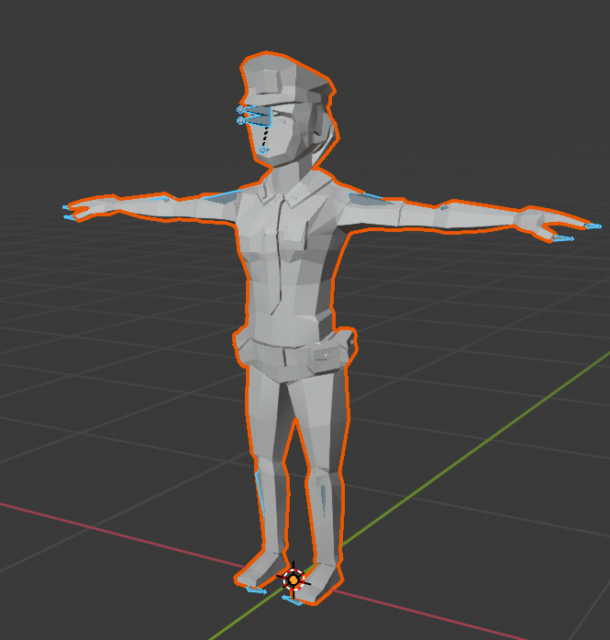
To utilise the texture, I find it helpful to switch into the Shading Tab in Blender. One time you're there, y'all'll likely see a pink character. That's Blender'southward way to proverb "hey I can't find that texture". Switch back into Object Mode, then click on the grapheme to select the geometry. You should run into a basic shader appear in the node window at the bottom of the screen.
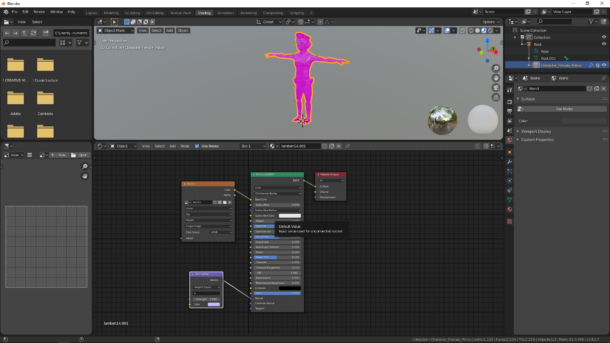
All nosotros need to tweak here is the box with the orange strap, which is a texture node. It references a pic that Blender can't find. Thankfully it even so knows the actual file name, so we'll be able to notice information technology easily. Click on the Open Image icon and browse to the textures binder that came with the Synty Assets and selection the 1 with the correct file name. Experience costless to try a unlike one, the Synty Characters come in a diversity of styles.
If you've done everything correctly, you'll see a textured graphic symbol now. Yous tin switch back into the Layout Tab now and turn on the Fabric Preview to run into the texture.

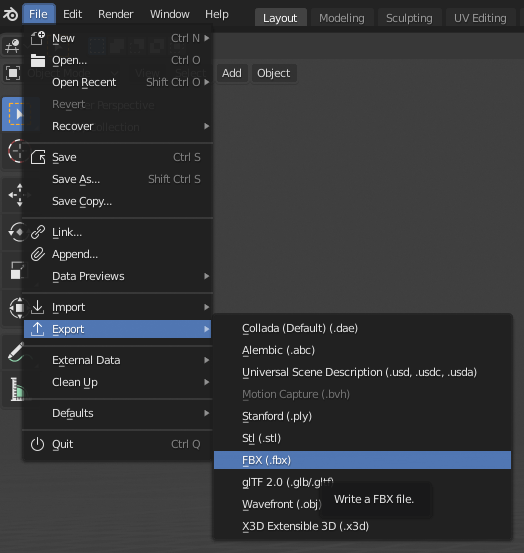
Exporting your character
Because nosotros've made some changes, we demand to export the FBX once again and then that Mixamo tin choice it upwardly correctly. To do this, head over to File – Export FBX. I leave all values equally the default, except for the super important one under Armature FBX Node. Make sure that Root is selected, or whatsoever else your character might be called. The default is Null, which ways that the FBX won't comprise whatsoever skeletal information, and therefore Mixamo will throw an error.
Too brand sure Add Leaf Bones is disabled.
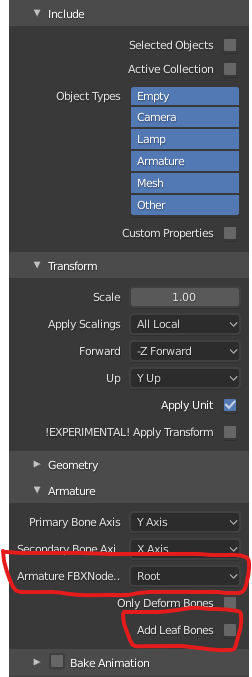
I've united nations-ticked Bake Animation considering we don't take whatsoever animation data right now. I've left "Selected Objects" disabled because we just have a single detail in the scene. Errors can sometimes creep in if you have more than ane object, or you've left the default camera and default lite in place. FBX would endeavor to consign everything, and I believe the Selected Objects pick might help you out in such scenarios.
Importing into Mixamo
Let'south add a snazzy animation to our Female Police force Officer. Head overt to Mixamo.com and login with your Adobe credentials. At the meridian left, choose Upload Character and browse to the FBX you lot've exported in the previous step.
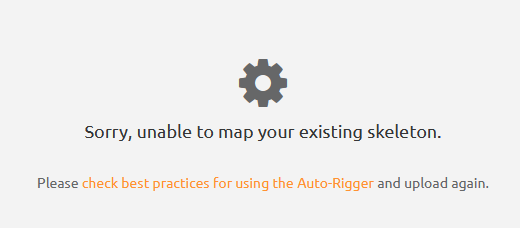
There is at least a 75% chance that this footstep volition be unsuccessful. When Mixamo is unhappy, you become a generic "this didn't quite work" message. That's incredibly unhelpful due to lack of detail. Should this happen to you, ane of the 97bn FBX options was incorrect. Which one will forever remain a mystery.
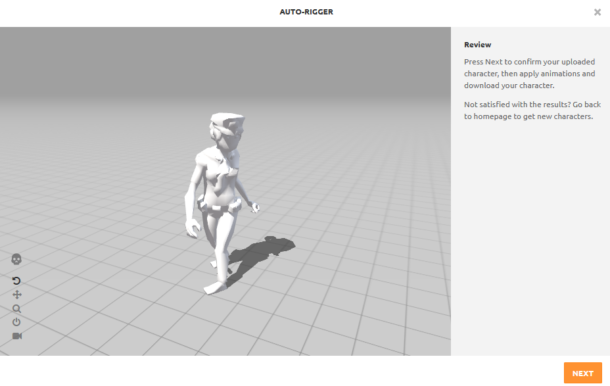
If you're in luck, yous'll see an untextured preview of your character in motility. They call this the Car Rigger. This is crusade for serious celebration, considering the rest of the whole journey is a piece of cake compared to getting here. Hit Next, and CONGRATS!
Pick 1 of the many animations you see on the left and arrange the backdrop every bit you see fit. If you see a bunch of characters instead of animations, in that location's a petty tab at the summit that lets you switch betwixt animations and characters (at least at the time I'm writing this – online interfaces modify at a staggeringly fast pace these days).
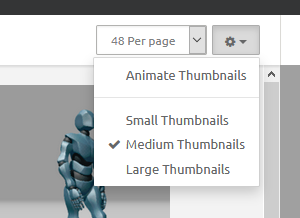
If your system struggles to evidence 48 animated GIF files AND an OpenGL viewport at those same time, at that place is an selection to disable the previews. Click on the little cog icon at the top left. It goes a long way to save some global energy, believe it or not. Animated GIF files, together with auto-correction, might well be the stop of our global InstaWhatsIt society one day… but I digress.
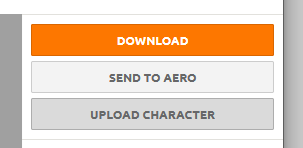
When yous're happy with your animation, choose Download and pick the appropriate options. I leave mine at the default, just I'll change the "frames per second" to threescore so that it works nicely with the animation that I'm edifice.
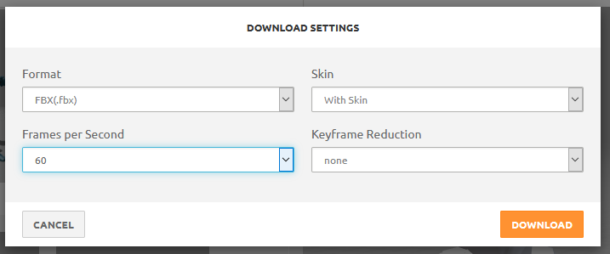
Hitting Download again to save your FBX file with these options.
Importing the blitheness into Blender
Now comes the fun part: importing the whole thing back into Blender, textures and all. I'm using the same import settings equally above, nonetheless this time I'm enabling the all of import Animation option.
A few moments later, Blender will have (hopefully) loaded your file, complete with all keyframes visible in the timeline. Annotation that the default blitheness duration is 250 frames, and your animation may exist longer or shorter than that. In my example, it's longer so when I hit Infinite to play, it appears to be cutting off after 250 frames. Set up it by adjusting the end frame in the bottom right.
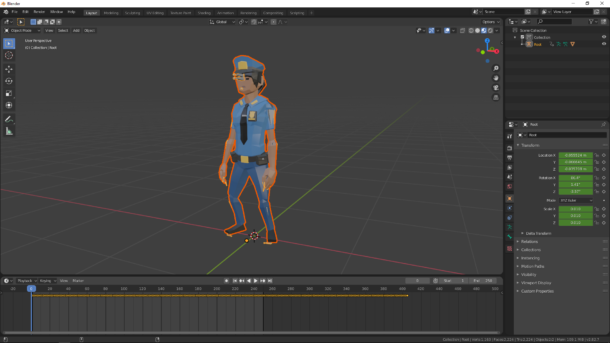
Don't worry about any bones that announced to stick out from our officer's face, Blender won't render them. To disable them, you tin switch off whatever overlay previews.
Conclusion
And there you have information technology! That'southward how we can bring Mixamo animations to Synty Characters, and use them in Blender. While they're made for game engines, they're such peachy assets to have for low poly Blender animations and background characters in large scenes.
I might cover how to turn those animations into re-usable and repeatable NLA blocks next, and how we can make a graphic symbol move frontwards in walk cycles. I might too turn this into a quick video while it's fresh in my head.
Happy animating (PS: don't get defeated).
Source: https://www.versluis.com/2020/03/using-synty-characters-with-mixamo-and-blender/
0 Response to "Textures Dont Show Up in Mixamo Upload"
Post a Comment